LNMP虽然有着各种一键安装包、docker镜像。但手动安装一遍更能了解这个环境的相关配置,虽然ubuntu自带的库中已经有了nginx、php、mysql,但没有和官方版同步。所以这次尽量以官方源安装LNMP环境。
一:安装Nginx
以官方源安装Nginx
官方安装教程:https://nginx.org/en/linux_packages.html#Ubuntu
安装依赖:
sudo apt install curl gnupg2 ca-certificates lsb-release ubuntu-keyring导入官方 nginx 签名密钥:
curl https://nginx.org/keys/nginx_signing.key | gpg --dearmor | sudo tee /usr/share/keyrings/nginx-archive-keyring.gpg >/dev/null验证下载的文件是否包含正确的密钥:
gpg --dry-run --quiet --no-keyring --import --import-options import-show /usr/share/keyrings/nginx-archive-keyring.gpg输出应包含完整的指纹 573BFD6B3D8FBC641079A6ABABF5BD827BD9BF62 ,同时也包含其他信息。如下所示:
pub   rsa2048 2011-08-19 [SC] [expires: 2027-05-24]
      573BFD6B3D8FBC641079A6ABABF5BD827BD9BF62
uid                      nginx signing key <[email protected]>

导入存储库:
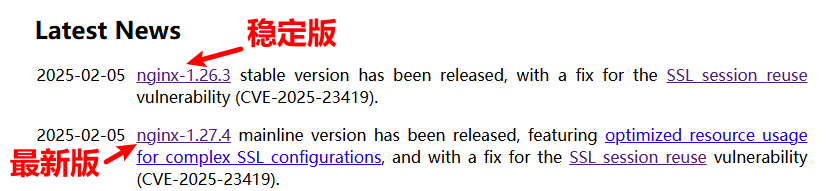
nginx存储库有两个,一个是nginx稳定版,apt安装时默认安装nginx最新稳定版。
另一个是nginx主线版,apt默认安装nginx最新版。两个版本任选其一即可。
添加稳定版存储库:
echo "deb [signed-by=/usr/share/keyrings/nginx-archive-keyring.gpg] \
http://nginx.org/packages/ubuntu `lsb_release -cs` nginx" \
    | sudo tee /etc/apt/sources.list.d/nginx.list
添加主线版存储库:
echo "deb [signed-by=/usr/share/keyrings/nginx-archive-keyring.gpg] \
http://nginx.org/packages/mainline/ubuntu `lsb_release -cs` nginx" \
| sudo tee /etc/apt/sources.list.d/nginx.list注:上面两条命令任选其一执行。
设置存储库:
echo -e "Package: *\nPin: origin nginx.org\nPin: release o=nginx\nPin-Priority: 900\n" \
    | sudo tee /etc/apt/preferences.d/99nginx
安装nginx:
sudo apt update
sudo apt install nginx
安装完成,本次选择安装nginx 1.26.3稳定版

ufw防火墙放行80端口
sudo ufw allow 80开启nginx
#开启 Nginx
sudo systemctl start nginx.service
#停止 Nginx
sudo systemctl stop nginx.service
#查看 Nginx运行状态
sudo systemctl status -l nginx.service
#重新启动 Nginx
sudo systemctl restart nginx.service
#取消开机启动 Nginx
sudo systemctl disable nginx.service
#重载Nginx (如更改Nginx配置需要重新载入数据)
sudo systemctl reload nginx.service
#设置开机启动
sudo systemctl enable nginx.service
#测试nginx配置文件
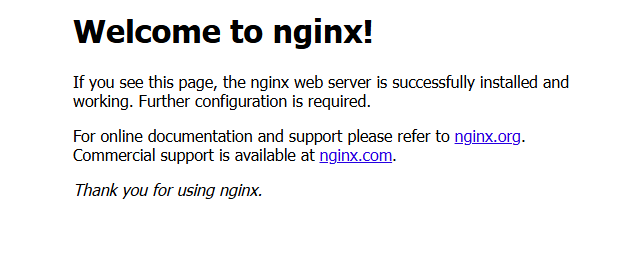
sudo nginx-t nginx启动成功
注意:官方存储库安装的nginx和ubuntu默认存储库安装的nginx配置文件结构不同。
ubuntu默认存储库配置文件结构:
ubuntu@Ubuntu:/etc/nginx$ tree
.
├── conf.d
├── fastcgi.conf
├── fastcgi_params
├── koi-utf
├── koi-win
├── mime.types
├── modules-available
├── modules-enabled
│   ├── 50-mod-http-geoip2.conf -> /usr/share/nginx/modules-available/mod-http-geoip2.conf
│   ├── 50-mod-http-image-filter.conf -> /usr/share/nginx/modules-available/mod-http-image-filter.conf
│   ├── 50-mod-http-xslt-filter.conf -> /usr/share/nginx/modules-available/mod-http-xslt-filter.conf
│   ├── 50-mod-mail.conf -> /usr/share/nginx/modules-available/mod-mail.conf
│   ├── 50-mod-stream.conf -> /usr/share/nginx/modules-available/mod-stream.conf
│   └── 70-mod-stream-geoip2.conf -> /usr/share/nginx/modules-available/mod-stream-geoip2.conf
├── nginx.conf
├── proxy_params
├── scgi_params
├── sites-available
│   └── default
├── sites-enabled
│   └── default -> /etc/nginx/sites-available/default
├── snippets
│   ├── fastcgi-php.conf
│   └── snakeoil.conf
├── uwsgi_params
└── win-utf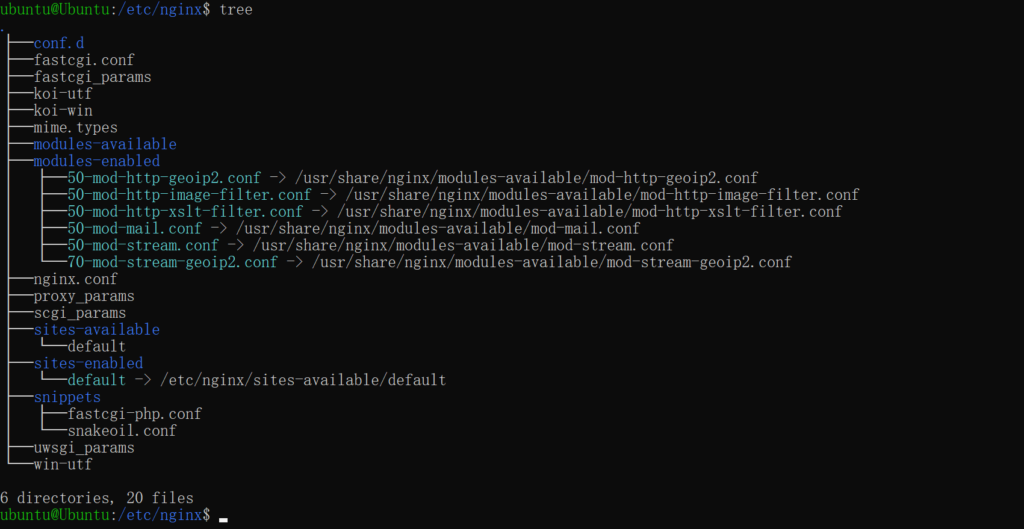
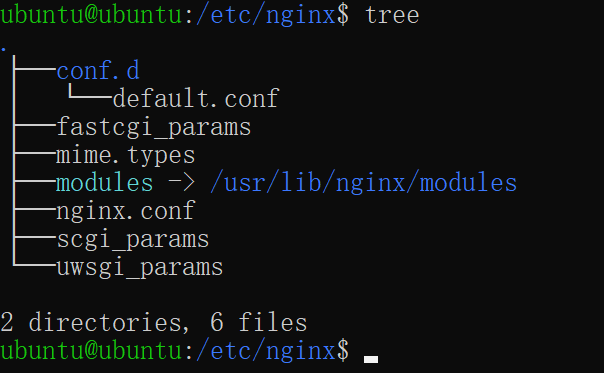
nginx官方版配置文件结构:
ubuntu@ubuntu:/etc/nginx$ tree
.
├── conf.d
│   └── default.conf
├── fastcgi_params
├── mime.types
├── modules -> /usr/lib/nginx/modules
├── nginx.conf
├── scgi_params
└── uwsgi_params

2 directories, 6 files
二:安装mysql
以官方源安装mysql
官方安装教程:https://dev.mysql.com/doc/refman/8.4/en/linux-installation-apt-repo.html
下载官方发布包:
打开MySQL APT 存储库的下载页面:
https://dev.mysql.com/downloads/repo/apt/
点击Download
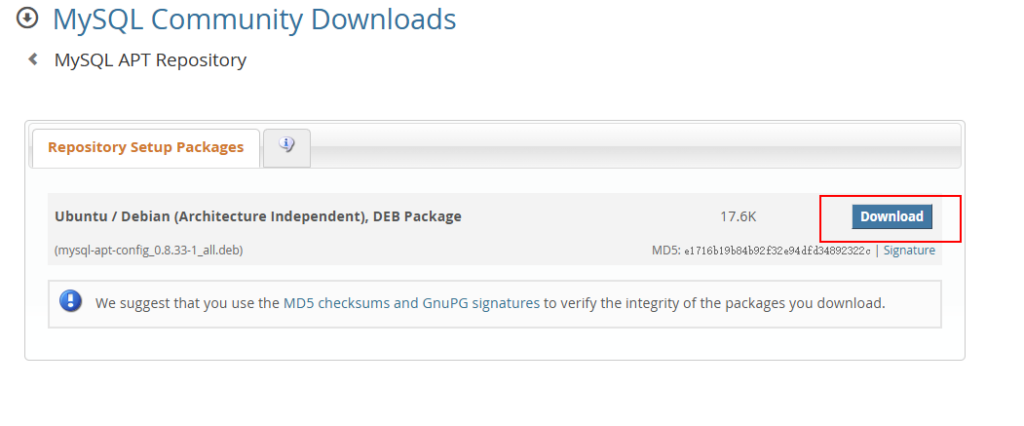
右键No thanks, just start my download.复制链接地址
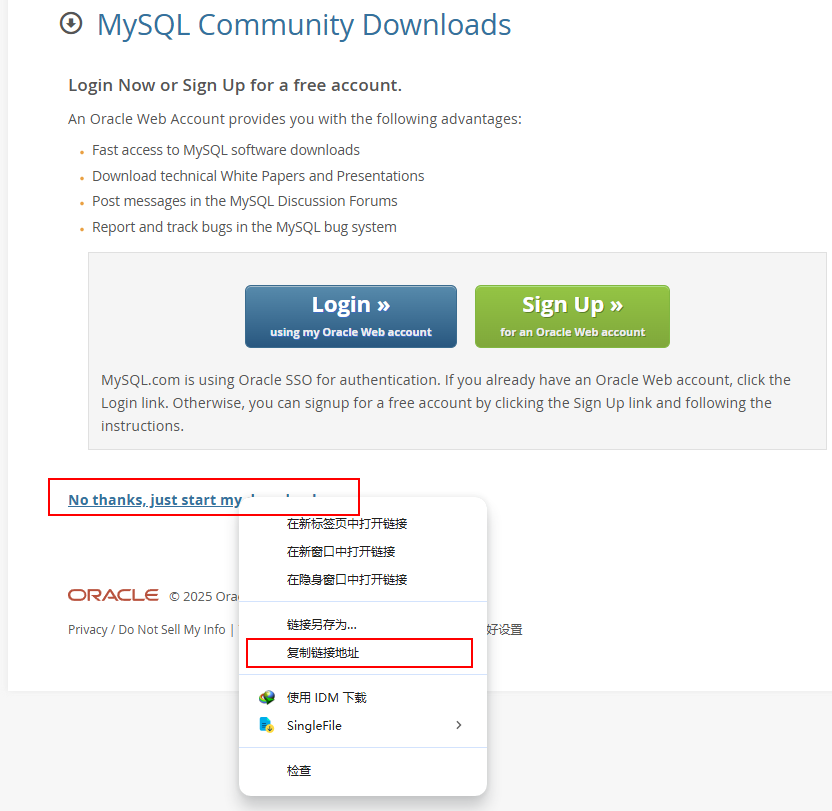
目前的地址为:https://dev.mysql.com/get/mysql-apt-config_0.8.33-1_all.deb
之后在ubuntu中用“wget 存储库地址”,下载存储库
wget https://dev.mysql.com/get/mysql-apt-config_0.8.33-1_all.deb下载完成,mysql-apt-config_0.8.33-1_all.deb

安装发布包
用下载的路径+包名替换下列命令中的PATH/version-specific-package-name.deb
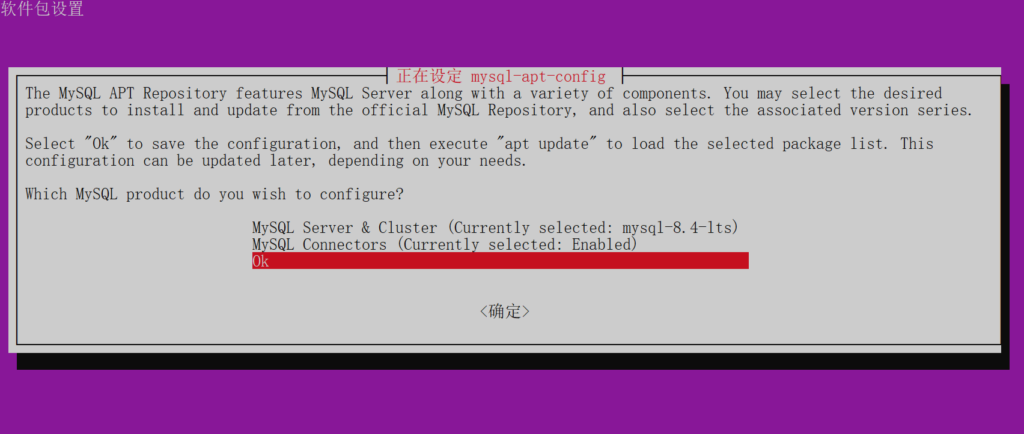
sudo dpkg -i /PATH/version-specific-package-name.deb本例是在用户名为“ubuntu”的家目录中执行的,所以,真正的安装命令为
sudo dpkg -i /home/ubuntu/mysql-apt-config_0.8.33-1_all.deb选择OK
安装mysql
sudo apt-get update
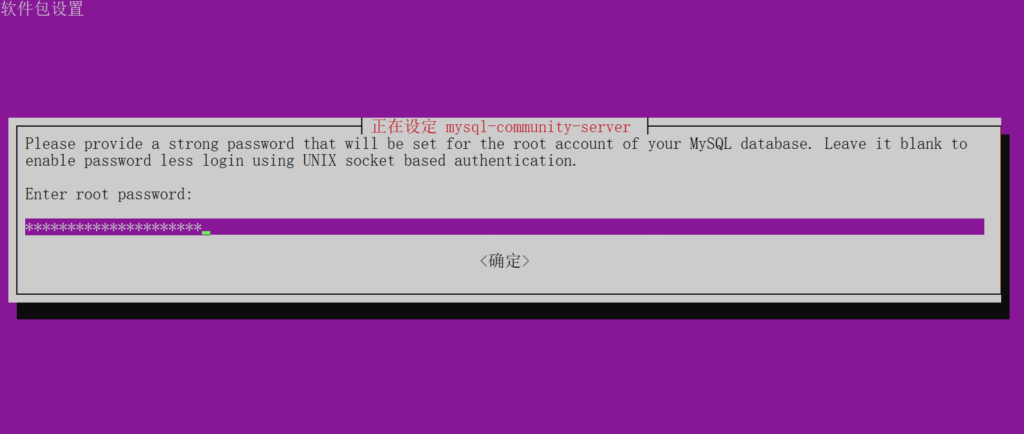
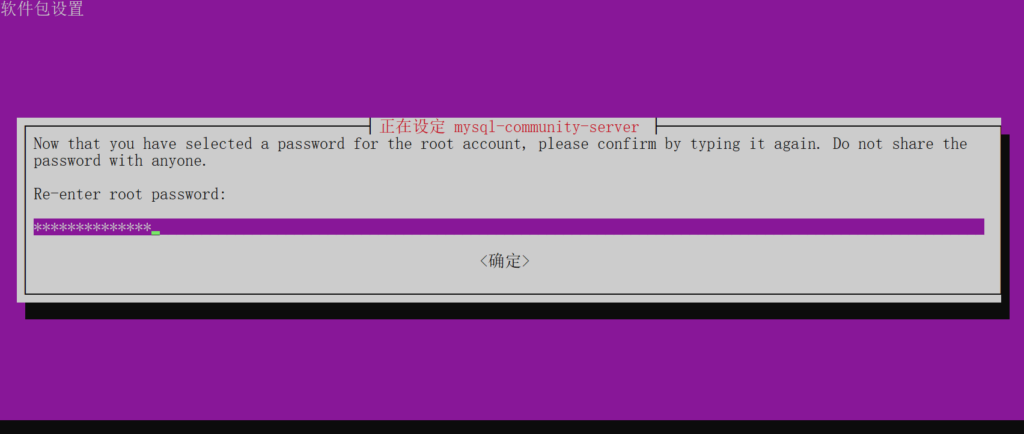
sudo apt-get install mysql-server安装时会弹出设置mysql root用户密码的界面。可设置亦可不设置,本例中选择设置。
确认密码:
安装完成
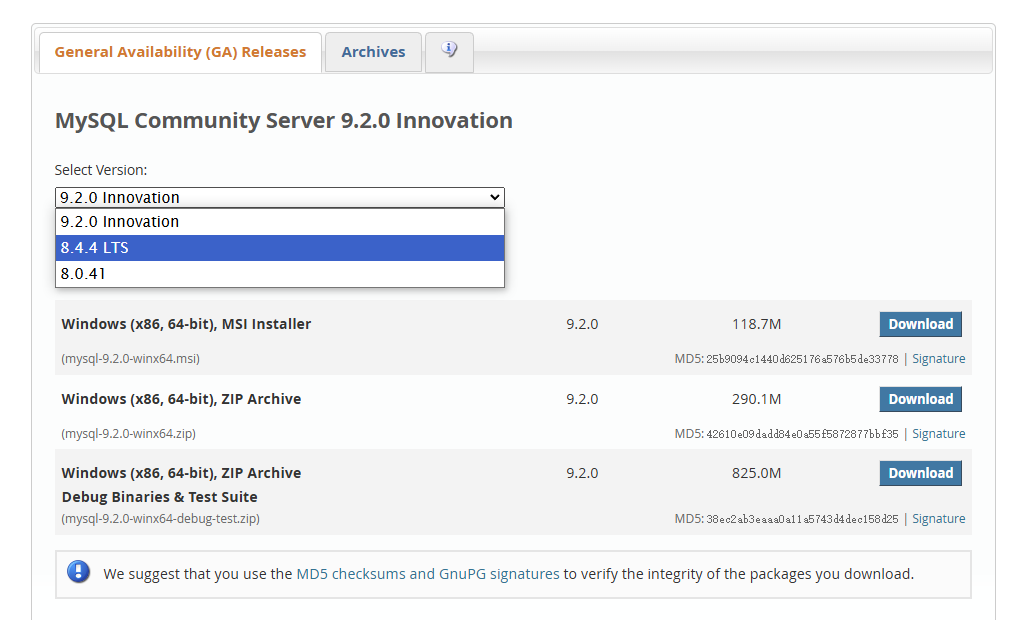
最新版8.4.4

查看版本:https://dev.mysql.com/downloads/mysql
登录mysql
mysql -u root -p
#输入root密码
安装完成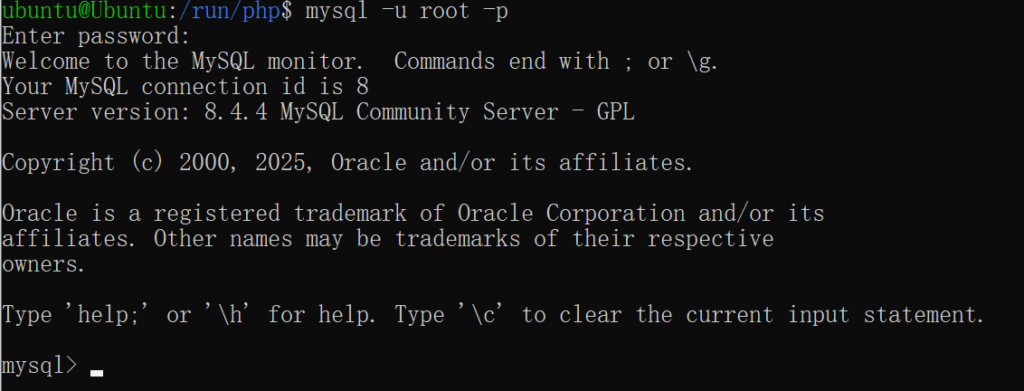
三:安装PHP
当前php的最新版本为8.4.4
ubuntu官方库没有PHP最新版,用第三方库安装
安装software-properties-common包
sudo apt update
sudo apt install software-properties-common
添加PPA仓库ppa:ondrej/php
sudo add-apt-repository ppa:ondrej/php安装php以及组件
sudo apt update
sudo apt install php8.4-fpm php8.4-mysql php8.4-curl php8.4-gd php8.4-intl php8.4-mbstring php8.4-soap php8.4-xml php8.4-xmlrpc php8.4-zip php8.4-imagick php8.4-common php8.4-cli php8.4-dev php8.4-imap php8.4-opcache php8.4-redis php8.4
安装完成


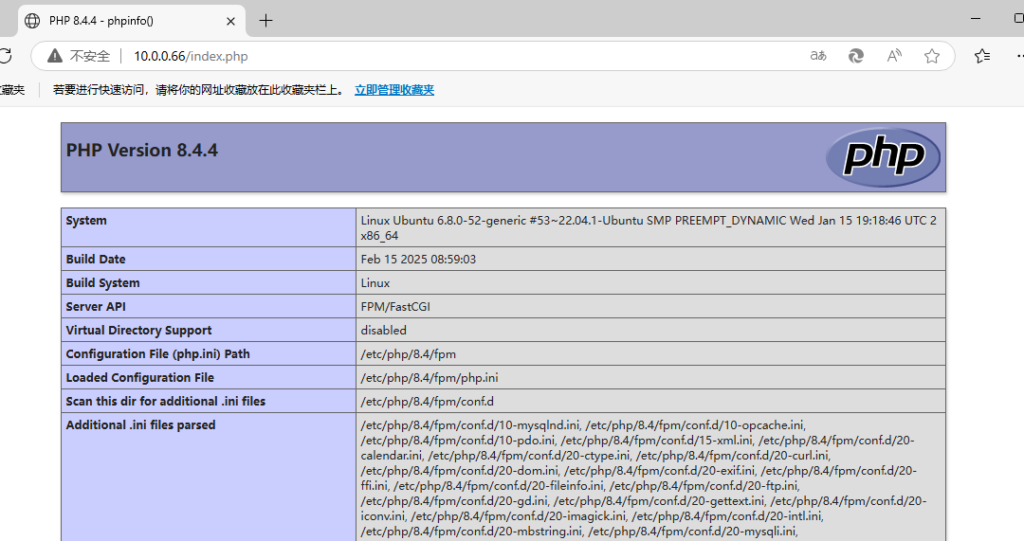
PHP 8.4.4最新版
sudo systemctl enable php8.4-fpm.service         #设置开机启动php8.4-fpm
sudo systemctl start php8.4-fpm.service          #启动php8.4-fpm服务
sudo systemctl stop php8.4-fpm.service                #停止 php8.4-fpm
sudo systemctl status -l php8.4-fpm.service          #查看 php8.4-fpm运行状态
sudo systemctl restart php8.4-fpm.service            #重新启动 php8.4-fpm
sudo systemctl disable php8.4-fpm.service           #取消开机启动 php8.4-fpm
四:验证LNMP环境
查询php-fpm默认监听地址,<version>替换为php版本号,本例中为8.4
sudo grep '^listen =' /etc/php/<version>/fpm/pool.d/www.conf
#本例中的实际命令为
sudo grep '^listen =' /etc/php/8.4/fpm/pool.d/www.conf
若返回值为127.0.0.1:9000,说明默认监听本地9000端口
本例中返回值为:listen = /run/php/php8.4-fpm.sock
表示默认监听sock文件,需要nginx运行用户对sock文件有读写权限。
打开nginx默认配置文件
sudo vi /etc/nginx/conf.d/default.conf原始文件:
server {
    listen       80;
    server_name  localhost;

    #access_log  /var/log/nginx/host.access.log  main;

    location / {
        root   /usr/share/nginx/html;
        index  index.html index.htm;
    }

    #error_page  404              /404.html;

    # redirect server error pages to the static page /50x.html
    #
    error_page   500 502 503 504  /50x.html;
    location = /50x.html {
        root   /usr/share/nginx/html;
    }

    # proxy the PHP scripts to Apache listening on 127.0.0.1:80
    #
    #location ~ \.php$ {
    #    proxy_pass   http://127.0.0.1;
    #}

    # pass the PHP scripts to FastCGI server listening on 127.0.0.1:9000
    #
    #location ~ \.php$ {
    #    root           html;
    #    fastcgi_pass   127.0.0.1:9000;
    #    fastcgi_index  index.php;
    #    fastcgi_param  SCRIPT_FILENAME  /scripts$fastcgi_script_name;
    #    include        fastcgi_params;
    #}

    # deny access to .htaccess files, if Apache's document root
    # concurs with nginx's one
    #
    #location ~ /\.ht {
    #    deny  all;
    #}
}
修改为
server {
    listen       80;
    server_name  localhost;
    index  index.html index.htm index.php;
    #access_log  /var/log/nginx/host.access.log  main;
    root   /usr/share/nginx/html;
    location / {


    }

    #error_page  404              /404.html;

    # redirect server error pages to the static page /50x.html
    #
    error_page   500 502 503 504  /50x.html;
    location = /50x.html {
        root   /usr/share/nginx/html;
    }

    # proxy the PHP scripts to Apache listening on 127.0.0.1:80
    #
    #location ~ \.php$ {
    #    proxy_pass   http://127.0.0.1;
    #}

    # pass the PHP scripts to FastCGI server listening on 127.0.0.1:9000
    #
    location ~ \.php$ {
        fastcgi_pass   unix:/run/php/php8.4-fpm.sock;
        fastcgi_index  index.php;
        fastcgi_param  SCRIPT_FILENAME  $document_root$fastcgi_script_name;
        include        fastcgi_params;
    }

    # deny access to .htaccess files, if Apache's document root
    # concurs with nginx's one
    #
    #location ~ /\.ht {
    #    deny  all;
    #}
}
注意:
root要移动到server模块下,或者放到location ~ .php$模块下
server模块下加入index index.php;
location ~ \.php$ 模块中fastcgi_pass要和php-fpm监听地址一致。监听sock文件需要在地址前加unix:
fastcgi_param SCRIPT_FILENAME /scripts$fastcgi_script_name;要改为fastcgi_param SCRIPT_FILENAME $document_root$fastcgi_script_name;
确保nginx运行用户和php用户保持一致
即/etc/php/8.4/fpm/pool.d/www.conf中
user = www-data
group = www-data
listen.owner = www-data
listen.group = www-data
要和/etc/nginx/nginx.conf中
user nginx;这一项保持一致
本例中不一致,故把/etc/nginx/nginx.conf文件中
user nginx;修改为user www-data;
修改完成后重载nginx
sudo systemctl reload nginx.service 若修改了www.conf文件也需要重新启动php-fpm
sudo systemctl restart php8.4-fpm.service在网页root目录下新建一个index.php文件
sudo vi /usr/share/nginx/html/index.php文件中写入以下内容:
<?php phpinfo(); ?>之后浏览器打开服务器ip/index.php
测试完成。