手动管理证书实在是太麻烦。acme.sh是一个能自动签发、自动续期的证书工具。默认申请ZeroSSL的证书,支持多种申请方式,会自动续期,实乃懒人福音,但命令稍微复杂些,且十分灵活。记录下用acme.sh申请TLS证书的教程。
项目地址:https://github.com/acmesh-official/acme.sh
官方wiki:https://github.com/acmesh-official/acme.sh/wiki
安装acme.sh
安装依赖
若安装过程中出现错误,可根据提示安装相关的依赖。
#centos
yum install openssl
yum install socat
yum install netcat

#Ubuntu
apt-get install openssl
apt-get install socat
apt-get install netcat
一:直接网络安装
#安装时无需输入邮箱
curl  https://get.acme.sh | sh
#或
wget -O -  https://get.acme.sh | sh

#但如今申请域名证书时仍要添加邮箱,所以安装时还是直接填入比较好。
#邮箱用于提醒证书过期
curl https://get.acme.sh | sh -s [email protected]
#或者
wget -O -  https://get.acme.sh | sh -s [email protected]
二:从git安装
git clone https://github.com/acmesh-official/acme.sh.git
cd ./acme.sh
./acme.sh --install -m [email protected]
三:删除acme.sh
acme.sh --uninstall四:安装说明
安装时允许任何用户安装到自己的家目录中,但申请证书时务必使用root用户。
安装程序将执行3个动作
- 1、在用户家目录中创建
.acme.sh目录,此目录也作为证书的默认存放目录 - 2、创建命令别名
acme.sh=~/.acme.sh/acme.sh,之后可直接使用acme.sh作为命令 - 3、创建cronjob每日检查证书,必要时自动更新证书。
可用sudo crontab -l查看cron配置,sudo crontab -e修改cron作业。
0 0 * * * "/home/user/.acme.sh"/acme.sh --cron --home "/home/user/.acme.sh" > /dev/null安装完成后必须关闭终端,再打开才能使别名生效。
或者使用source命令直接生效
source ~/.bashrc检查是否生效alias(图中安装在root目录中)
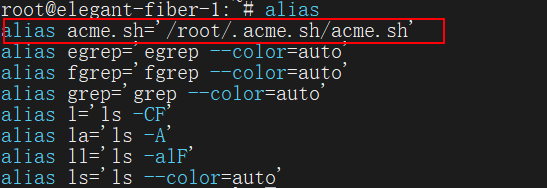
安装完成,查看版本acme.sh -v

五:更新acme.sh脚本
#更新脚本
acme.sh --upgrade
#设置自动更新
acme.sh --upgrade --auto-upgrade
#取消自动更新
acme.sh --upgrade --auto-upgrade 0
acme.sh申请证书
一:选择CA
acme.sh 2.x版本默认使用Let’s Encrypt作为服务提供商,3.x之后默认使用的是ZeroSSL,目前acme.sh支持5个正式的CA。
- ZeroSSL.com CA
- Letsencrypt.org CA
- BuyPass.com
- SSL.com
- Google.com CA
可通过命令切换不同的申请机构
#切换ZeroSSL
acme.sh --set-default-ca --server zerossl
#切换Letsencrypt
acme.sh --set-default-ca --server letsencrypt
#切换BuyPass
acme.sh --set-default-ca --server buypass
#切换SSL.com
acme.sh --set-default-ca --server ssl.com
#切换Google
acme.sh --set-default-ca --server google
二:申请证书
切换root用户
su - 申请证书、安装证书时请在安装acme.sh脚本的家目录中进行
acme.sh提供了多种申请方式,本文只介绍以下几种方式:
- Webroot 模式
- 独立模式
- 独立tls-alpn 模式
- Nginx 模式
- 无状态模式
- DNS API模式
- …………
说来惭愧,不会用Apache。就不记录Apache的申请方式了
安装时若没有填写邮箱,便无法申请证书,需要根据提示添加邮箱
acme.sh --register-account -m [email protected]证书会被放在~/.acme.sh/example.com/目录中(example.com是你申请证书的域名)
Webroot 模式
acme.sh --issue -d example.com -w /home/wwwroot/example.com- -d 后接你的域名
- -w 后接网站root目录
- example.com 换成你自己的域名
独立模式
独立模式需要确保80(TCP)不被占用。也就是说当Nginx监听80端口或防火墙关闭80端口等行为时均无法申请证书。
acme.sh --issue --standalone -d example.com
acme.sh --issue --standalone -d example.com -d www.example.com -d cp.example.com- –standalone 表示独立模式
- -d 后可同时申请多个域名
- example.com 换成你自己的域名
若使用非标准端口可用以下命令指定端口
acme.sh --issue -d example.com --standalone --httpport 1256- –httpport 后接指定的端口号
- example.com 换成你自己的域名
独立tls-alpn 模式
独立tls-alpn模式需要确保443(TCP)不被占用。也就是说当Nginx监听443端口或防火墙关闭443端口等行为时均无法申请证书。
acme.sh --issue --alpn -d example.com
acme.sh --issue --alpn -d example.com -d www.example.com -d cp.example.com- –alpn 表示独立tls-alpn模式
- -d 同理可申请多域名
- example.com 换成你自己的域名
同理若使用非标准端口可用以下命令指定端口
acme.sh --issue -d example.com --alpn --tlsport 8443- –tlsport 后接指定的端口号
- example.com 换成你自己的域名
Nginx 模式
acme.sh --issue --nginx -d example.com - –nginx 表示nginx模式
- example.com 换成你自己的域名
若acme.sh无法找到nginx配置文件可以手动指定
acme.sh  --issue  -d example.com  --nginx /etc/nginx/nginx.conf
#或者
acme.sh  --issue  -d example.com  --nginx /etc/nginx/conf.d/example.com.conf
此模式会在nginx配置文件中添加一条规则,申请完成后删除添加的规则。所以不会修改你的配置文件(改了再改回去等于没修改……0_o! )
申请时,nginx中至少有以下配置文件,example.com 换成你自己的域名。
server {
	listen 80;
	listen [::]:80;
	server_name example.com;

}
由于nginx配置的灵活性,某些情况下会导致证书申请失效;尤其是配置了url重写/重定向的情况下。
nginx url重写/重定向要写成如下配置
server {
    listen 80;
    server_name www.example.com;

    location / {
         return 301 https://$host$request_uri;
    }
}
或者
server {
     listen 80;
     server_name www.example.com;

     location / {
        rewrite ^(.*)$ https://${server_name}$1 permanent;
     }
}
不要写成以下的方式,否则可能申请失败。
server {
    listen 80;
    server_name  www.example.com;
    return 301 https://$host$request_uri;
}
或
server {
    listen 80;
    server_name  www.example.com;
    rewrite ^(.*)$ https://${server_name}$1 permanent;
}
参见:https://github.com/acmesh-official/acme.sh/issues/5058
无状态模式
#获取你的帐户密钥指纹:
acme.sh --register-account
#之后显示的字段中会有着类似于一下结构的字段
ACCOUNT_THUMBPRINT='6ikpBx2DVyG0Irx8q8To2ZerUtItW2DHzDzD9wZaEKpqd'
#复制指纹  6ikpBx2DVyG0Irx8q8To2ZerUtItW2DHzDzD9wZaEKpqd
#nginx 中添加以下内容
http {
...
  server {
  ...
    location ~ ^/\.well-known/acme-challenge/([-_a-zA-Z0-9]+)$ {
      default_type text/plain;
      return 200 "6ikpBx2DVyG0Irx8q8To2ZerUtItW2DHzDzD9wZaEKpqd";
    }
  ...
  }
}
#之后便可直接申请证书了
acme.sh --issue -d example.com  --stateless
DNS API模式
DNS模式分为DNS API和DNS手动模式。只有DNS API可以自动更新证书,同时只有DNS API模式能申请泛域名证书(通配符证书),如果网站挂了CF之类的CDN,并只配置了CDN的访问权限,那么只能用这种方式申请证书。
DNS API支持列表:https://github.com/acmesh-official/acme.sh/wiki/dnsapi
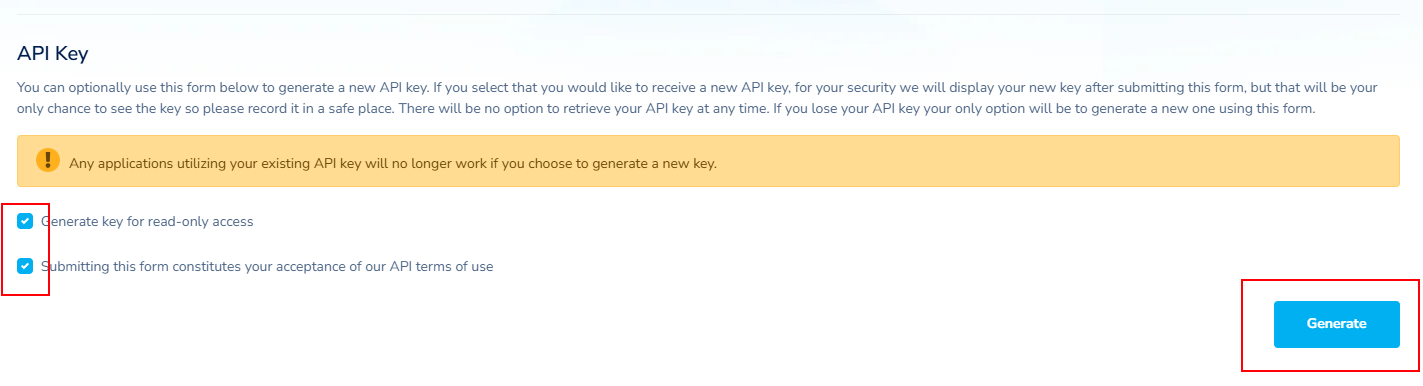
namesilo
打开https://www.namesilo.com/account/api-manager生成一个新的API key,之后复制你的Key
申请证书
#把<key>替换为你个人的Key
export Namesilo_Key="<key>"
./acme.sh --issue --dns dns_namesilo -d example.com -d *.example.com
#泛域名证书(*.example.com)不包括顶级域名(example.com),所以申请时也要把顶级域名加上。- –dns 后接DNS服务商
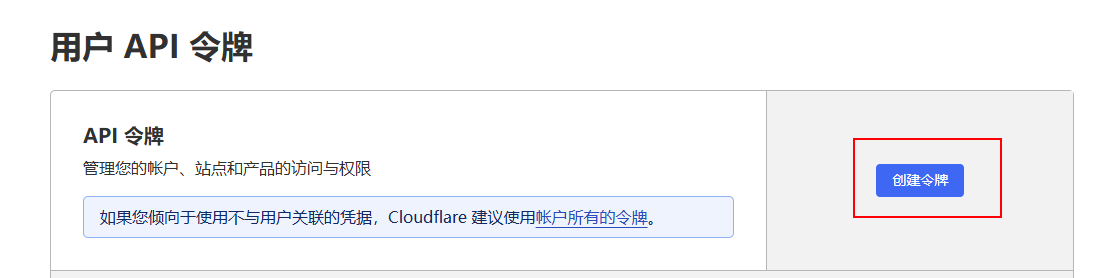
cloudflare
打开API令牌界面https://dash.cloudflare.com/profile/api-tokens创建令牌
编辑区域DNS
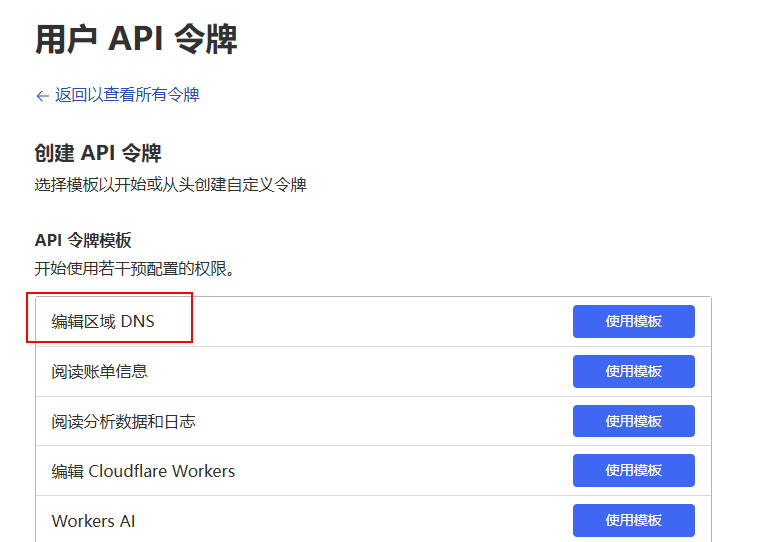
权限这里设置成区域;DNS;编辑
区域资源这里选择包括;特定区域;选择你的域名
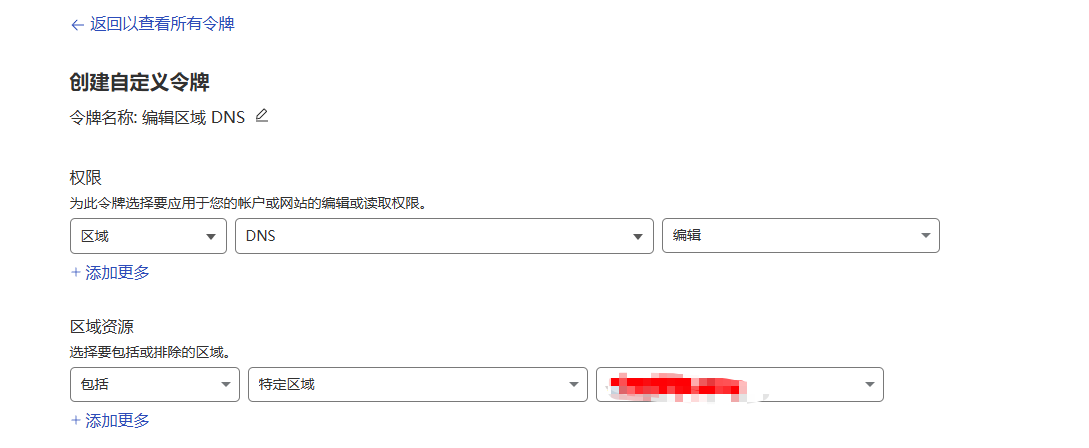
之后便生成了API密钥
申请证书
#把<key>替换为你个人的Key
export CF_Zone_ID="<key>"
./acme.sh --issue --dns dns_namesilo -d example.com -d *.example.com
#泛域名证书(*.example.com)不包括顶级域名(example.com),所以申请时也要把顶级域名加上。- –dns 后接DNS服务商
申请ECC证书
acme.sh默认申请RSA证书,也支持申请ECC证书。申请ECC证书十分简单,只需加上--keylength即可。
acme.sh --issue -w /home/wwwroot/example.com -d example.com --keylength ec-256- –keylength 后接密钥类型
- ec-256 密钥类型,ec-256为默认类型
--keylength参数说明:
| ec-256 (prime256v1,“ECDSA P-256”,这是默认密钥类型) |
| ec-384 (secp384r1, “ECDSA P-384”) |
| ec-521(secp521r1,“ECDSA P-521”,Let’s Encrypt 目前还不支持。) |
| 2048(RSA2048) |
| 3072 (RSA3072) |
| 4096 (RSA4096) |
多域名(SAN 证书),多模式
用不同的方式申请包含多个域名,的单个证书。域名可完全不同。
acme.sh  --issue  \
-d aa.com  -w /home/wwwroot/aa.com \
-d bb.com  --dns dns_cf \
-d cc.com  --nginx \
-d dd.com  -w /home/wwwroot/dd.com
查看证书详细信息:
acme.sh --info -d example.com申请纯IPv6证书
如果域名只配置了解析IPv6地址,需要加上 --listen-v6 命令
acme.sh --issue --nginx -d example.com --keylength ec-256 --listen-v6安装(复制)证书
证书生成后,可将证书安装(复制)到nginx或其他服务中。不要手动复制,否则会出现acme.sh无法自动更新证书等情况。
#nginx为例
#此命令是把
#~/.acme.sh/example.com/中的key文件复制/path/to/keyfile/in/nginx/
#并重命名为key.pem
#把~/.acme.sh/example.com/中的cert文件复制/path/to/fullchain/nginx/
#并重命名为cert.pem
#之后重载nginx
acme.sh --install-cert -d example.com \
--key-file       /path/to/keyfile/in/nginx/key.pem  \
--fullchain-file /path/to/fullchain/nginx/cert.pem \
--reloadcmd     "systemctl reload nginx.service"

#同理,ECC证书
acme.sh --install-cert -d example.com \
--fullchainpath     /etc/nginx/ssl/server.crt \
--key-file           /etc/nginx/ssl/server.key \
--reloadcmd     "systemctl reload nginx.service" \
--ecc
参数详解:
--cert-file自定义证书文件(CRT)的路径--key-file自定义私钥文件(KEY)的路径--ca-file自定义中间证书(CA)的路径--fullchain-file自定义完整链证书(FullChain)的路径--reloadcmd安装证书后执行的命令--ecc使用了ECC证书
更多详细参数请参阅官方文档https://github.com/acmesh-official/acme.sh/wiki/Options-and-Params
更新证书
正常配置好后会自动更新证书,若出现意外也可以手动强制更新。
#强制更新证书
acme.sh --renew -d example.com --force
#强制更新ECC证书
acme.sh --renew -d example.com --force --ecc
更新完成后可能还需要重复安装(复制)证书
可用acme.sh --list查看证书下次自动更新时间。亦可对cron直接debug进行查看:
"/root/.acme.sh"/acme.sh --cron --home "/root/.acme.sh" --debug
#如下字段便是更新时间
Skipping. Next renewal time is: 2025-02-01T09:49:55Z或者使用acme.sh --cron --force直接强制自动更新。
停止证书更新
acme.sh --remove -d example.com
acme.sh --remove -d example.com --ecc
Nginx参考配置
此处只给出了nginx的基本配置。也可通过https://ssl-config.mozilla.org/生成配置文件
server {
    listen 80;
    server_name example.com;

    location / {
         return 301 https://$host$request_uri;
    }
}
server {
    listen 443 ssl;
    listen [::]:443 ssl;
    http2 on;
    ssl_certificate /etc/nginx/ssl/server.crt; #你的ssl证书*.crt 或者*.pem都可以
    ssl_certificate_key /etc/nginx/ssl/server.key; #你的ssl key
    ssl_ciphers ECDHE-ECDSA-AES128-GCM-SHA256:ECDHE-RSA-AES128-GCM-SHA256:ECDHE-ECDSA-AES256-GCM-SHA384:ECDHE-RSA-AES256-GCM-SHA384:ECDHE-ECDSA-CHACHA20-POLY1305:ECDHE-RSA-CHACHA20-POLY1305:DHE-RSA-AES128-GCM-SHA256:DHE-RSA-AES256-GCM-SHA384:DHE-RSA-CHACHA20-POLY1305;
    ssl_protocols TLSv1.2 TLSv1.3;
    root /usr/share/nginx/html; #网页路径
    server_name example.com; #你的服务器域名

    location / {
         ..........................
    }
}
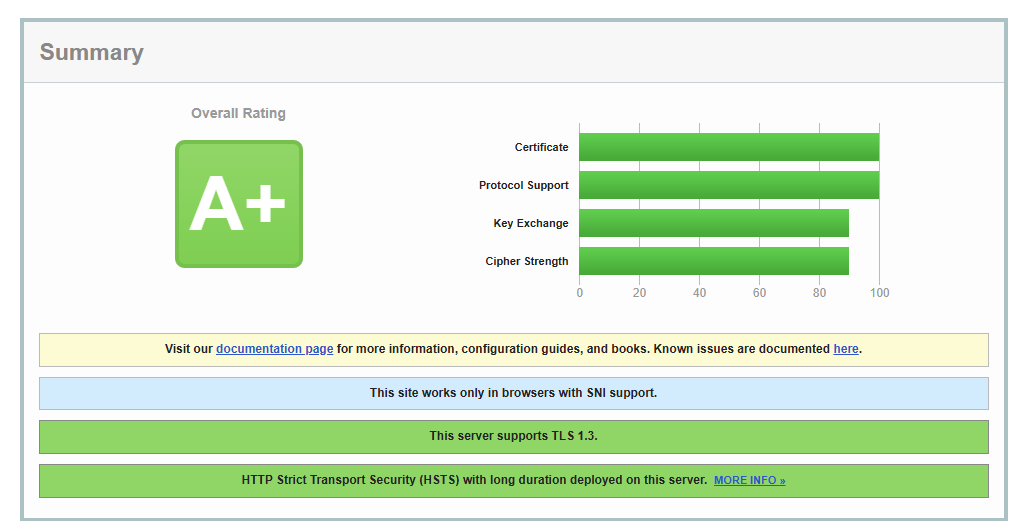
SSL证书测试
https://www.ssllabs.com/ssltest
非root用户下的使用
安装脚本
由于linux用户权限的问题,一般用户无法执行很多操作。但对生产环境而言,root用户安装和执行脚本可能会造成安全问题。所以还是需要非root用户执行脚本。这里创造一个名为acmetest的新用户设置为不可登录用户。acme脚本安装在acmetest的家目录中。同样也需要全程以root用户配置。但脚本acmetest用户运行。
创建新用户。
#创建名为acmetest的不可登录用户。同时创建家目录,用来放证书和脚本。
sudo useradd -r -s /sbin/nologin -m -d /home/acmetest acmetest
为acmetest用户安装脚本。
#切换回root用户
su -

#进入acme家目录
cd /home/acmetest

#下载脚本
sudo -u acme git clone https://github.com/acmesh-official/acme.sh.git
#进入目录
cd acme.sh
#安装脚本
sudo -u acme ./acme.sh --install -m [email protected]
#安装完成。
设置脚本自动更新
sudo -u acmetest /home/acmetest/.acme.sh/acme.sh --upgrade --auto-upgrade检查crontab定时任务
#sudo crontab -u acmetest -l查看cron配置,确保有以下内容
23 21 * * * "/home/acmetest/.acme.sh"/acme.sh --cron --home "/home/acmetest/.acme.sh" > /dev/null

#没有的话手动编辑,把上面的内容加进去
sudo crontab -e
申请证书
非root用户可选的方法不多,这里只介绍两个。
webroot
webroot有一个比较万能的方法可以很灵活的申请多个证书。让nginx配置文件中所有的server拦截域名验证请求,并指向一个专门用来申请证书的webroot目录。webroot目录命名为www。
创建webroot目录
#创建www目录
sudo -u acmetest mkdir -p /home/acmetest/www/
#创建nginx配置文件目录
mkdir /etc/nginx/acme.d
编辑nginx配置文件
vi /etc/nginx/acme.d/acme.conf

#写入以下配置
location ^~ /.well-known/acme-challenge/ {
    #指向刚刚创建的目录
    root /home/acmetest/www;
    try_files $uri =404;
}

#之后申请证书时为每个server引用acme.conf配置文件。
server {
    listen 80;
    server_name blog.example.com;
    include /etc/nginx/acme.d/acme.conf;
    location / {

        return 301 https://$host$request_uri;

    }
}
server {
    listen 80;
    server_name test.com;
    include /etc/nginx/acme.d/acme.conf;
    location / {
        proxy_pass http://127.0.0.1:9090;
    }
}
配置文件权限
www目录需要能被acme.sh写,被nginx读。确保目录属于acmetest,权限为755
chown -R acmetest:acmetest /home/acmetest/www/
chmod 755 /home/acmetest/www/
此外还要保证nginx能一路确保访问acmetest家目录。
chmod o+x /home/acmetest
#要确保nginx能进入路径上的每个目录。
申请证书
#之后acme.sh的路径都要使用绝对路径
sudo -u acmetest /home/acmetest/.acme.sh/acme.sh --issue  -d example.com  -w /home/acmetest/www/
#申请之后再配置443端口。
DNS-01
(待补充)
安装(复制)证书
证书的安装目录需要属于acmetest用户,权限建议700。要确保acme.sh能畅通无阻的进入目录。
#把证书安装在/home/acmetest/ssl/为例
sudo -u acmetest mkdir -p /home/acmetest/ssl/
#确保目录权限
chown -R acmetest:acmetest /home/acmetest/ssl
#确保权限
chmod 700 /home/acmetest/ssl
以安装到nginx为例。
由于安装证书时需要执行--reloadcmd "sudo systemctl reload nginx.server"。所以需要给acmetest用户单独配置sudo systemctl reload 免密的权限。nginx.server
确认systemctl命令的绝对路径。
which systemctl
#正常会返回/bin/systemctl 或 /usr/bin/systemctl
#这里返回了/usr/bin/systemctl
编辑 Sudoers 文件
sudo visudo
#在最下方添加下面一行
#注意,如果which systemctl返回的是/bin/systemctl要修改对应的位置。
acmetest ALL=(root) NOPASSWD: /usr/bin/systemctl reload nginx.service
#保存退出

#测试。如果没弹出输入acmetest的密码,就算成功了。
sudo -u acmetest sudo systemctl reload nginx.service


#如果一直需要输入密码,就把这些全部加上。
acmetest ALL=(root) NOPASSWD: /bin/systemctl reload nginx
acmetest ALL=(root) NOPASSWD: /bin/systemctl reload nginx.service
acmetest ALL=(root) NOPASSWD: /usr/bin/systemctl reload nginx
acmetest ALL=(root) NOPASSWD: /usr/bin/systemctl reload nginx.service
之后就可以随意安装证书了。
#安装(复制)证书
sudo -u acmer /home/acmer/.acme.sh/acme.sh --install-cert -d example.com \
--key-file       /home/acmetest/ssl/key.pem  \
--fullchain-file  /home/acmetest/ssl/cert.pem \
--reloadcmd     "sudo systemctl reload nginx.service"

#同理,ECC证书
sudo -u acmer /home/acmer/.acme.sh/acme.sh --install-cert -d example.com \
--fullchainpath     /home/acmetest/ssl/server.crt \
--key-file           /home/acmetest/ssl/server.key \
--reloadcmd     "sudo systemctl reload nginx.service" \
--ecc
配置完成。